
Terminox Installation
Terminox
PLEASE NOTE
All TerminoxISM™ Iron filters are custom made to order normally. The pictures and videos may not always look exactly like what came in the boxes, but the videos explain things pretty well. For example, there are a number of electronic control valves we might use on the top of a tank. So if the one you have does not look exactly like the one in any given picture or video, that is ok. The minerals that you pour in the tank can be quite different from one unit to the next.
IMPORTANT!
Do not assemble or install your Terminox filter until you are certain your pH is 7.5 or higher. Doing so will void all warranties. You MUST correct your pH BEFORE you install your Terminox or any other filters or softeners. Running low pH water through your Terminox can damage the minerals inside. And that’s really no fun at all to have to correct. The very minimum pH should be 7.5. It is always best to be 7.7 or higher if possible to allow for fluctuations that may occur in the water from rain, underground springs, or other situations that may make the pH fluctuate in the well.
SHORTAGES AND MISSING PARTS
MUST BE REPORTED WITHIN 24 HOURS OF RECEIVING ORDER. WE WILL CERTAINLY REPLACE ANY MISSING or DAMAGED PARTS. PLEASE BE REASONABLE AND REPORT IN A TIMELY MANNER.
Terminox normally is placed after the pressure tank, and before a water softener, if you have one.
Included items with your shipment
- Mineral Tank 7″-12″ Units
- Riser Tube- It goes inside the tank to distribute water.
- Digital Control Valve (The brains of the unit). These are sometimes called the “Head” of the unit. The smaller units are custom made and may not have a digital controller. Just look at the control valves page to see the different type controllers. The control valves (Controllers) are the electronic “Head” that sits on top of the tank. Please note that Control Valves are pre-programmed for you. For more information, go to the “Control Valves” tab at the top of the page, and select your control valve.
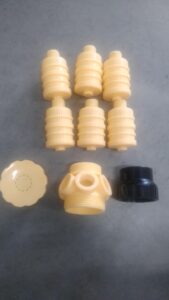
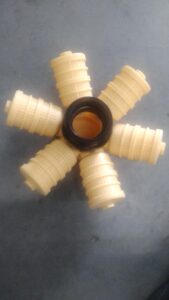
- Upper Basket (Do not install control valve without basket)
- Lower Basket (This goes onto the bottom of the riser tube – Do not install riser tube without the lower basket)
- Transformer 12v for Control valve (Plugs into any 110v Household outlet)
- INLET and OUTLET connections for your electronic control valve (Head) will be a threaded male connection. You simply screw your water line pipe onto it.
- Bypass Valve (optional) If you did not order one, you should make one. Most units will come with a bypass valve already on the control valve. It connects exactly as explained above.
- Fitting for the drain line. NO drain is line included. You have to acquire your own drain line. We suggest 5/8″ inner diameter clear flexible tubing. Available at most hardware stores, Lowes, Home Depot etc. You normally don’t want any 90 degree elbows on your drain line. That is why we use flexible tubing. This type of tubing is normally very inexpensive to buy.
- For tanks larger than 14″ diameter–Hub & Laterals
NOTE: The TerminoxISM™ ISM is to be installed after the pressure tank.
NOTE: If you have a septic system without a drain field you should consider using a dry well for your drain line.
OPTIONAL: If there is to be an incoming flow restrictor installed, to reduce flow rate, then it should be prior to the incoming water line to the TerminoxISM™.
NOTE: We strongly recommend that you install a testing port (spigot or faucet) before and after each piece of filter equipment. It’s always good to be able to test the water going into and coming out of each filter.
When installing a filter on an irrigation system, we strongly recommend that you add a pressure tank for proper operation. While irrigation systems without pressure tanks often work quite well when properly sized, we do not guarantee the operation or outcome on irrigation systems that do not have a pressure tank.
TerminoxISM™ ISM Filter Installation Instructions:
Items needed for the this part of the installation are: Mineral tank, Riser tube, Minerals that you pour into the tank after adding the gravel, Control Valve, O ring for under the control valve and Upper Basket.
Place the tank in the position where it will be plumbed in, as it will be heavy to lift after it’s filled with mineral and water. You want to plumb it in after the pressure tank, but before the water line “Ts” off. It’s a good idea to keep the filter 10 ft. (of plumbing pipe, not 10 ft. of distance) from the hot water heater to prevent the filter from taking in heat and damaging it, though it is very rare to see that happen. Sometimes the tank will get knocked off center with the black base on the bottom of the tank. The base is just a “Leveler”. If it gets knocked a bit off center in route to you, you do not need a new tank. You just simply put a 2 x 4 or cardboard on the ground and gently tap the tank on that and it will get back to center. DO NOT BANG THE TANK ON CONCRETE or HARD SURFACES.
BEFORE Loading Minerals into the tank:
NOTE: FILL THE MEDIA TANK BEFORE CUTTING YOUR PLUMBING YOU WILL NEED TO ADD WATER TO THE TANK AFTER YOU PUT THE MEDIA IN.
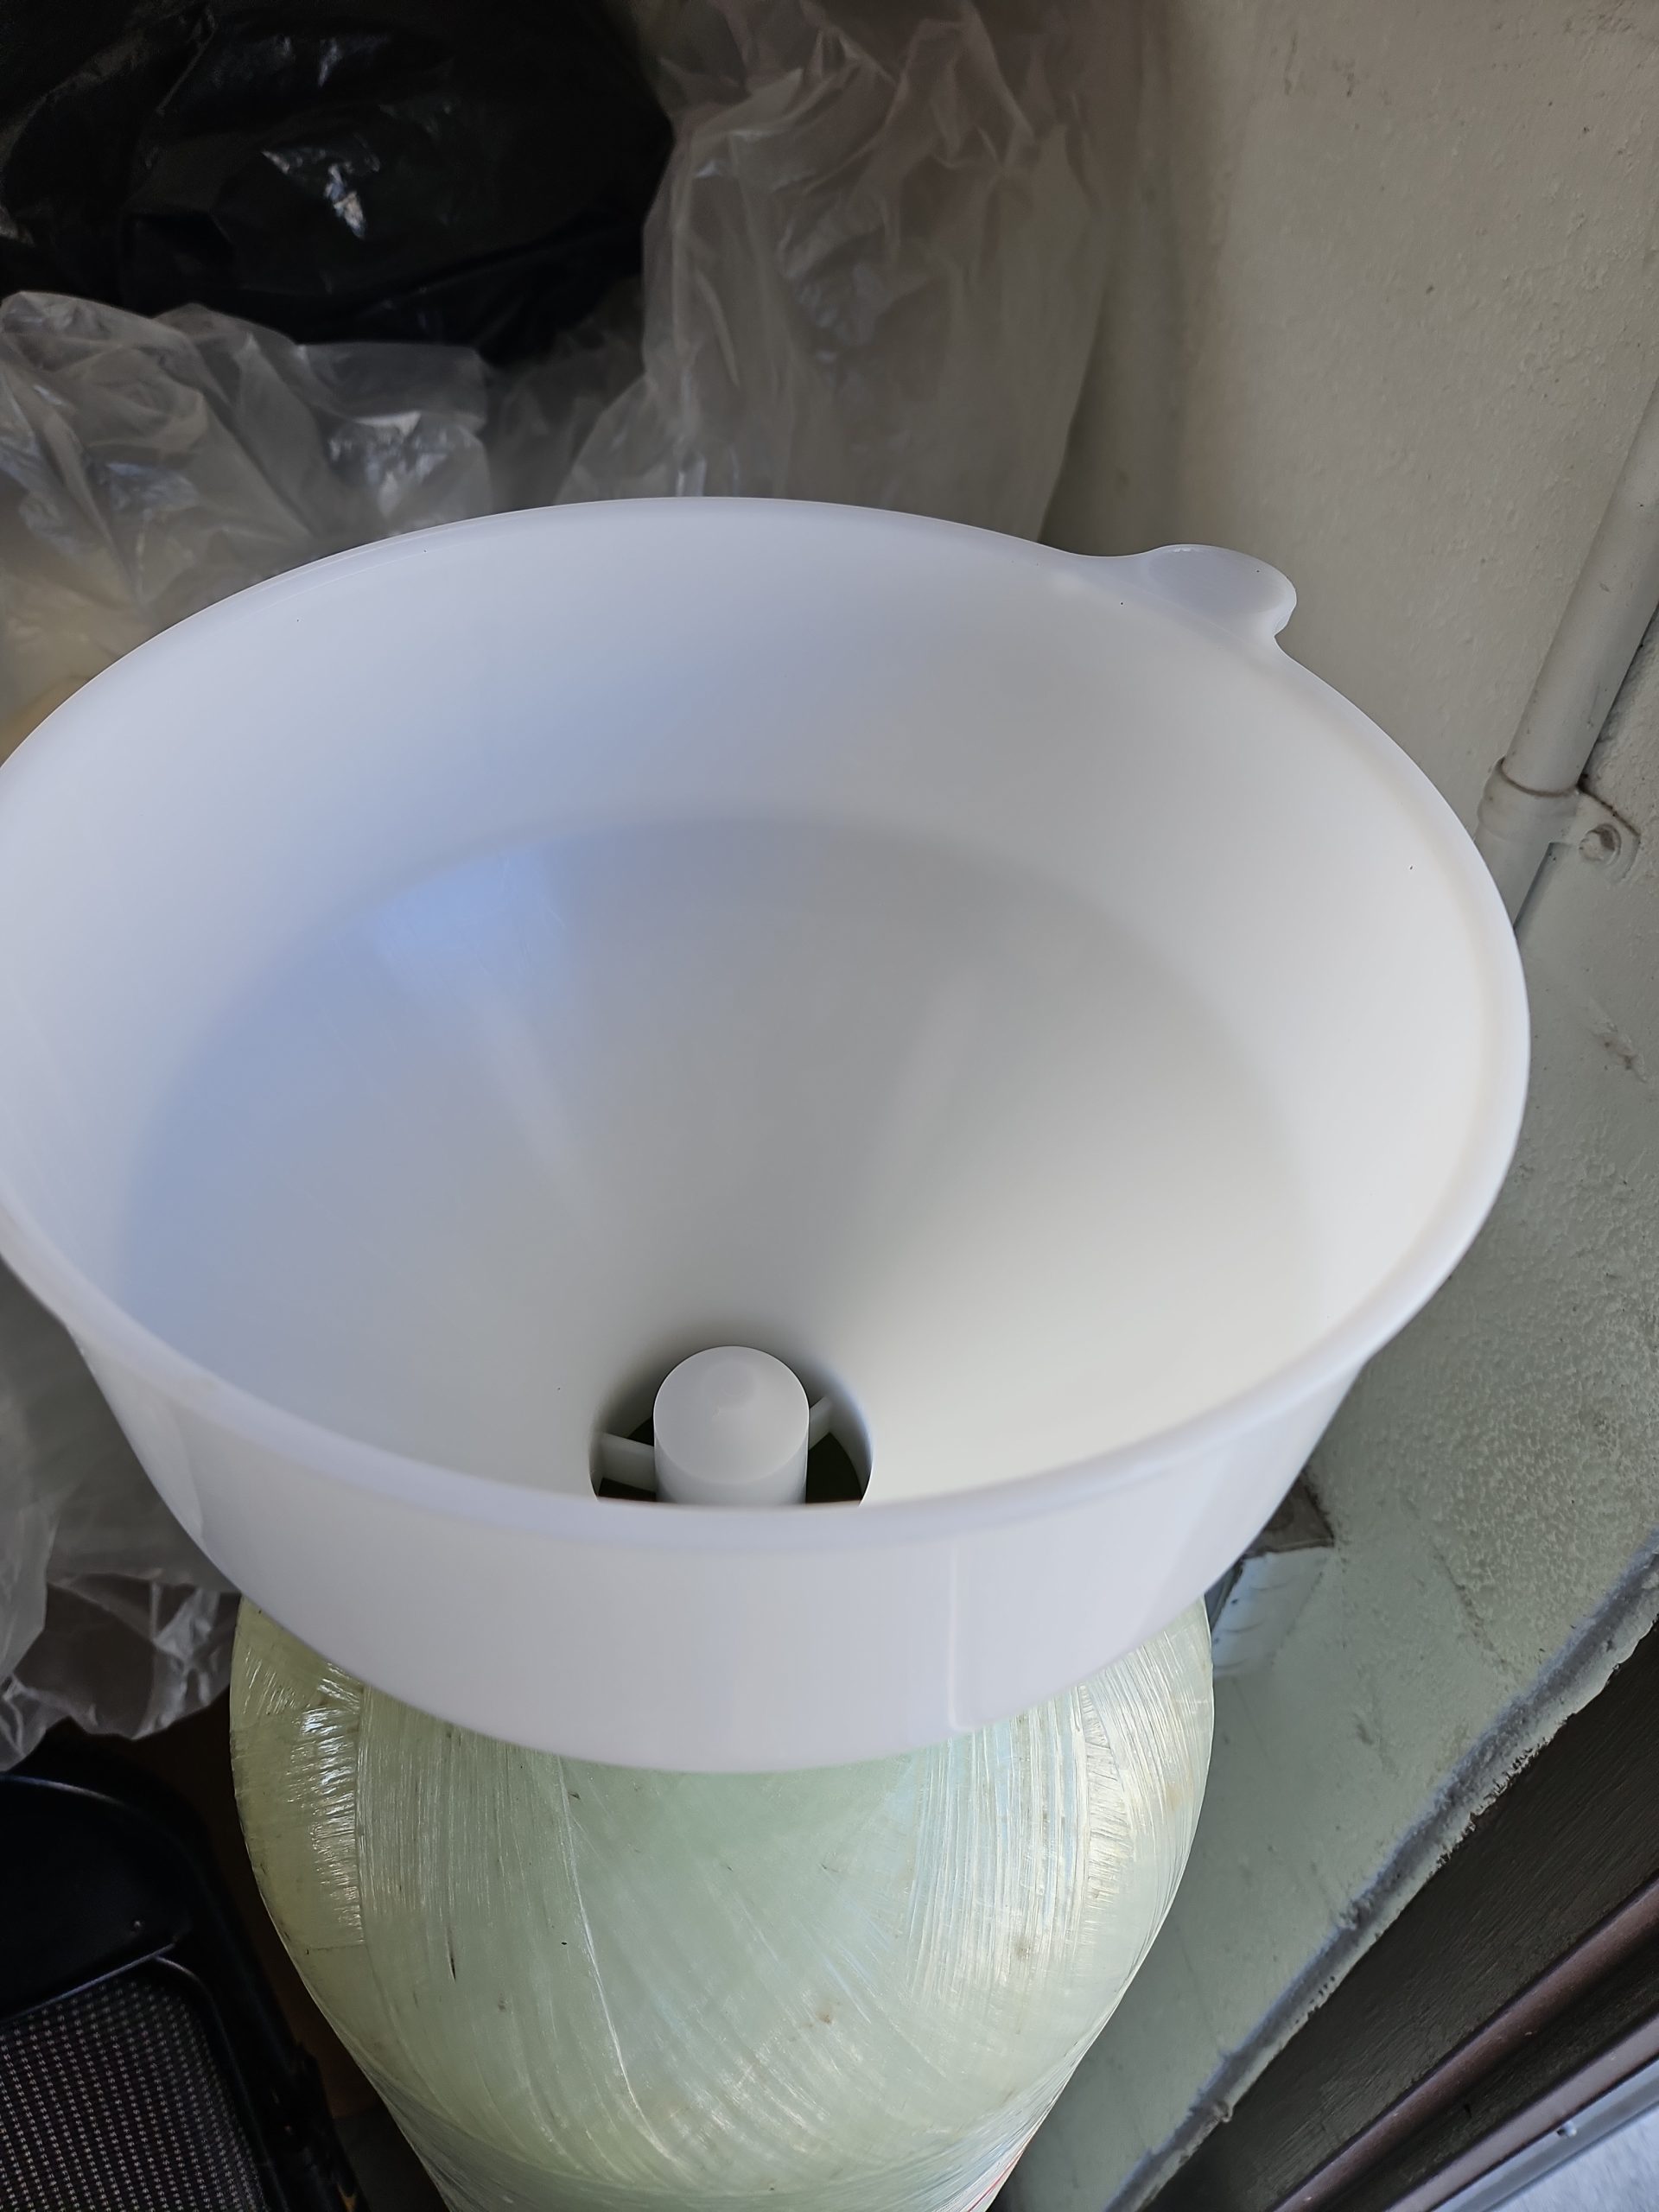
You should receive a white funnel with your order that will cover the riser tube for you, but if you didn’t receive the white funnel then cover the riser tube (a sandwich baggie and a rubber band is a good idea). The tube may come with a blue cap, or other type cap already on it. If this is the case, you don’t need a baggie. Before you assemble the unit (after you pour in the mineral), you MUST remove whatever you used as a cap. But leave it on until all the mineral has been poured into the tank. Make sure your riser tube has a basket on the bottom end. Center the tube in the tank.
PLEASE NOTE: For larger size tanks, 14″ or more, make sure the hub is assembled in the bottom of the tank, as in the 2 pictures below. Your riser tube will fit into this.
You will usually find a white funnel in your kit–use this funnel to add the mineral to the tank. Be sure to add the gravel first as it is what holds the bottom basket the riser tube in place.
NOTE: If the funnel is omitted from the order, you can fashion out a “homemade funnel” by using a milk jug and cutting the bottom out and using that as funnel.
LOADING MINERALS INTO YOUR NEW TERMINOX:
If you have any questions or concerns, please contact our Tech Support Team at techsupport@waterfiltersofamerica.com The Tech Support Hotline is at 412-828-6003. That support Hotline opens at 11am Eastern Time (10am Central-8am Pacific) each day. It is open at 10am Eastern time on most Saturdays and for a few hours on most holidays. Try to call early on weekends and holidays because they sometimes leave early if there are no calls. Your TerminoxISM™ISM is custom built to treat your water and may not contain all of the minerals that are in the videos. Please install them in the order they are listed below.
Please make sure that the bottom basket in on the bottom of the riser tube before you add the minerals.
We have color coded your minerals by placing a colored dot (or the name of the color) on the packaging as indicated below to assist in your installation:
(1) Gravel (May have a Yellow dot or labeled “Yellow” )
(2) Terminox (May have a White dot or labeled “White”)
NOTE: Please try to fill the tank with water after you pour in the minerals if possible. Our new white mineral funnel is normally included with your order. ALSO NOTE: You must NOT pour minerals into the riser tube that is inside the tank. Our new white mineral funnel will cover the rise to help prevent this from happening but if you didn’t get the white funnel for some reason there may be a cap on it that you can remove after the minerals are in the tank. Or you can simply wrap a sandwich baggy on the top of the tube opening, and then remove it AFTER all of the minerals are in the tank. It is ok if you get water in the tube.
IMPORTANT! Once you have the unit assembled and installed, you MUST do an initial backwash of the unit until the water runs clear as it goes down the drain line that is connected to the unit. You need to put the unit into backwash, and once the unit is in the backwash mode and the 15min timer is counting down and water is rushing down the drain line, simply UNPLUG the unit from the power source this will stop the timer and lock the unit into a backwash. Then let the water run until it is crystal clear. Once the water runs clear then plug the unit back in and it will pick up from where it left off completing the cycle on it’s own in about 30mins. Once that is finished, simply make sure the unit is set for the correct time of day and you are done! Remember that the water may take a long time to run clear down the drain line, especially on larger units. It takes longer to run clear if you stare at it… It’s ok to go do something else for a bit while waiting for it to run clear..
*Please note:
Do not get anything other than water into the riser tube.
Make sure you leave at least 12 inches of space in the top of the TerminoxISM™ tank. 12″ from the top of the media to the top of the tank DON’T overfill it. In almost all cases we will send the proper amount of media and this should not be an issue but just to be on the safe side be sure the media level does not come within 12″ from the top of the tank.
Sometimes you may receive more mineral shipped than necessary, though it is very unusual. Remember not to fill the tank completely full of mineral. You need AT LEAST 12″ of free space in the top of the tank so that the unit can properly backwash. In some tanks the mineral won’t come up to 12″ of open space. This is normal. You just want to be sure there is AT LEAST 12″ of space in the top of the tank. If there is any leftover mineral in a bag, just seal it up in some fashion so that no little critters can get in there, and the mineral will last for years should you ever need to add more. NOTE: Not all mineral tanks we sell will have 12 inches of air space some may be substantially more air space.
After the minerals have been put into the tank, you will fill the tank to the top with water before you put the mineral basket and control valve on.
If you purchased the optional bypass valve you will need to install it onto the control valve.

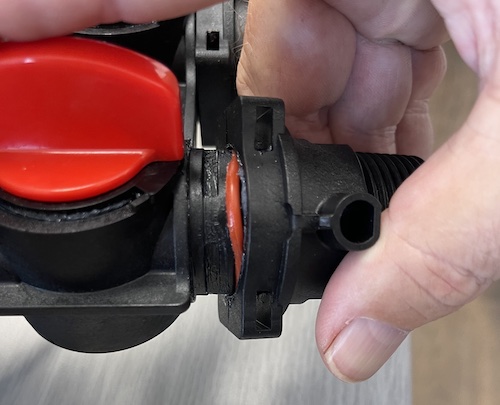
Be very careful not to “pinch” the o-rings, as shown in the picture below.
Basket (There are a number of different types of baskets, so yours make look a bit different.
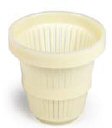
You should have received a top “basket” (shown above) with your equipment. It simply clips onto the bottom of the control valve with a little turn, and goes over the riser tube, there are notches on the bottom of the valve molding that will accept the notches and lock the basket into place. It may not look exactly like this one. Basket styles vary from unit to unit.
NOTE: VERY IMPORTANT! The top basket is an essential piece of equipment. If you did not receive a basket, then you should immediately call our tech support number and speak to one of our tech’s and get the basket sent out to you.
Before you screw the control valve on, turn it over and make sure the o-ring on the bottom of the control valve that seals the top of the tank with the control valve is still in place. Sometimes they fall into the box they came in. You should not throw any boxes or wrapping away until you are COMPLETELY finished with your installation. The O-ring fits inside the groove of the locking ring, make sure that ring is not spinning freely, it locks with notches on the valve.
When threading on the control valve, just get it “SNUG” don’t “crank it down”.
For more information on your control valve, go to the “Control Valves” tab at the top of the page and select your valve. Instructions and manual for the WFOA control valve can be found here.
NOTE: It is very important to fill up the Terminox with water before cutting the plumbing in the home. If you forget to put water in it and you have already cut the pipes, at this point, do not panic; turn on the water very slowly, with the unit in “Backwash” mode, after plumbing it in, so that the tank fills up with water. It may take a few minutes to fill and start coming out of the drain. If you have not forgotten to fill up the tank, then you still want to turn on the water slowly so that you do not push air into the tank and cause “hammering”; which a loud rattling of the pipes and sometimes a loud banging sound when going into regeneration. It is helpful to fill the tank through the riser tube that prevents air, as it fills from the bottom up.
OPTIONAL startup procedure:
If you have not filled the tank with water, and do now know how to get the control valve into the backwash cycle while filling the tank. You can open a nearby faucet AFTER the Terminox unit. Turn on the water supply SLOWLY and let the water trickle into the tank to fill it. Once the water starts coming out of the faucet you have opened, you know the tank is full of water, and you can finish the rest of the start up procedure.
DRAIN LINE: Your drain line in most cases should be clear 5/8″ inner diameter flexible plastic tubing that is available in almost all hardware stores. It is very inexpensive and requires no HARD ELBOWS. Try to never use hard 90 degree elbows on your drain line. If you simply must use 90 degree hard elbows, you may want to step up to a larger drain line. You also normally don’t want the drain line to run more than 20 ft. before the air gap as a rule.
Be sure to gently secure the drain line with a “clamp” so that you do not run the risk of the hose coming off and creating havoc by flooding the area around the unit.
If you plan on a run of longer then 40 ft. then you would attach a 5/8″ to 3/4″ fitting, purchased from hardware store, we do not provide that, and run 3/4″ tubing. Do not hard plumb the drain line into sewer lines, it must be “air-gapped”.
A Little about air gaps: the translation is to just simply have the smaller hose drain into a 1.5″ or bigger so that when the Terminox is in backwash you do not want it to back up and cause back pressure on the valve. You do not want to hard plumb any drain line and you do not want to hook up 2 drain lines together. Any form of back flow preventer acts as restriction so please do not use those. If you have more than one backwashing unit, whether a filter or softener, DO NOT have them backwash or regenerate at the same time of day. “Stagger” them at different times.
The most common air gap type of drain is your washing machine drain line. When installing that way, make sure that the hose is secured so that it does not spray every where and cause flooding.
This type of air gap (Pictured) is available for purchase at most hardware stores if you need to put something like that in your home, and you can’t tap into large pipe in the home. Note: Running the drain line to a sump pump has worked for some people but it may back-up depending on the speed of your sump also.
PLUMBING THE UNIT IN:
Find the main water supply line and start doing your plumbing. There will be threaded fittings on the back of the valve you can screw on PVC, Copper or other fittings.
NOTE: It is a good idea to plumb in a hose bib or faucet after the pressure tank but before the Terminox to allow you to test pH and chlorine levels, if necessary. It never hurts to install an inspection faucet after each unit as well. It will allow you to test the water coming directly from that unit. If you have multiple units, softeners, chemical feeders etc, it is best to have inspection faucets before and after each unit for quality control checks.
Time to connect the Control head to power and start the backwash. Be sure you have checked all of your connections and there are no leaks. Control valves are pre-programmed for you. If you have any questions about the programming contact the tech support department at techsupport@waterfiltersofameric.com or call 412-828-6003.
Important! Remember to manually backwash the system after installation. To do this, first unlock the valve by pressing the right arrow and the up arrow at the same time. Once valve is unlocked, press the manual button (the button that looks like a hand)
NOTE: If you purchased a chem feeder to regulate your pH, it is very important that you install your chem feeder and have a pH of 7.5 or higher. You never want to expose your TerminoxISM™ to acidic water. The chemical feed system is to be installed prior to the pressure tank. If you have purchased the chemical feed for iron bacteria then it is as important to install first. Acid water will ruin Terminox.